
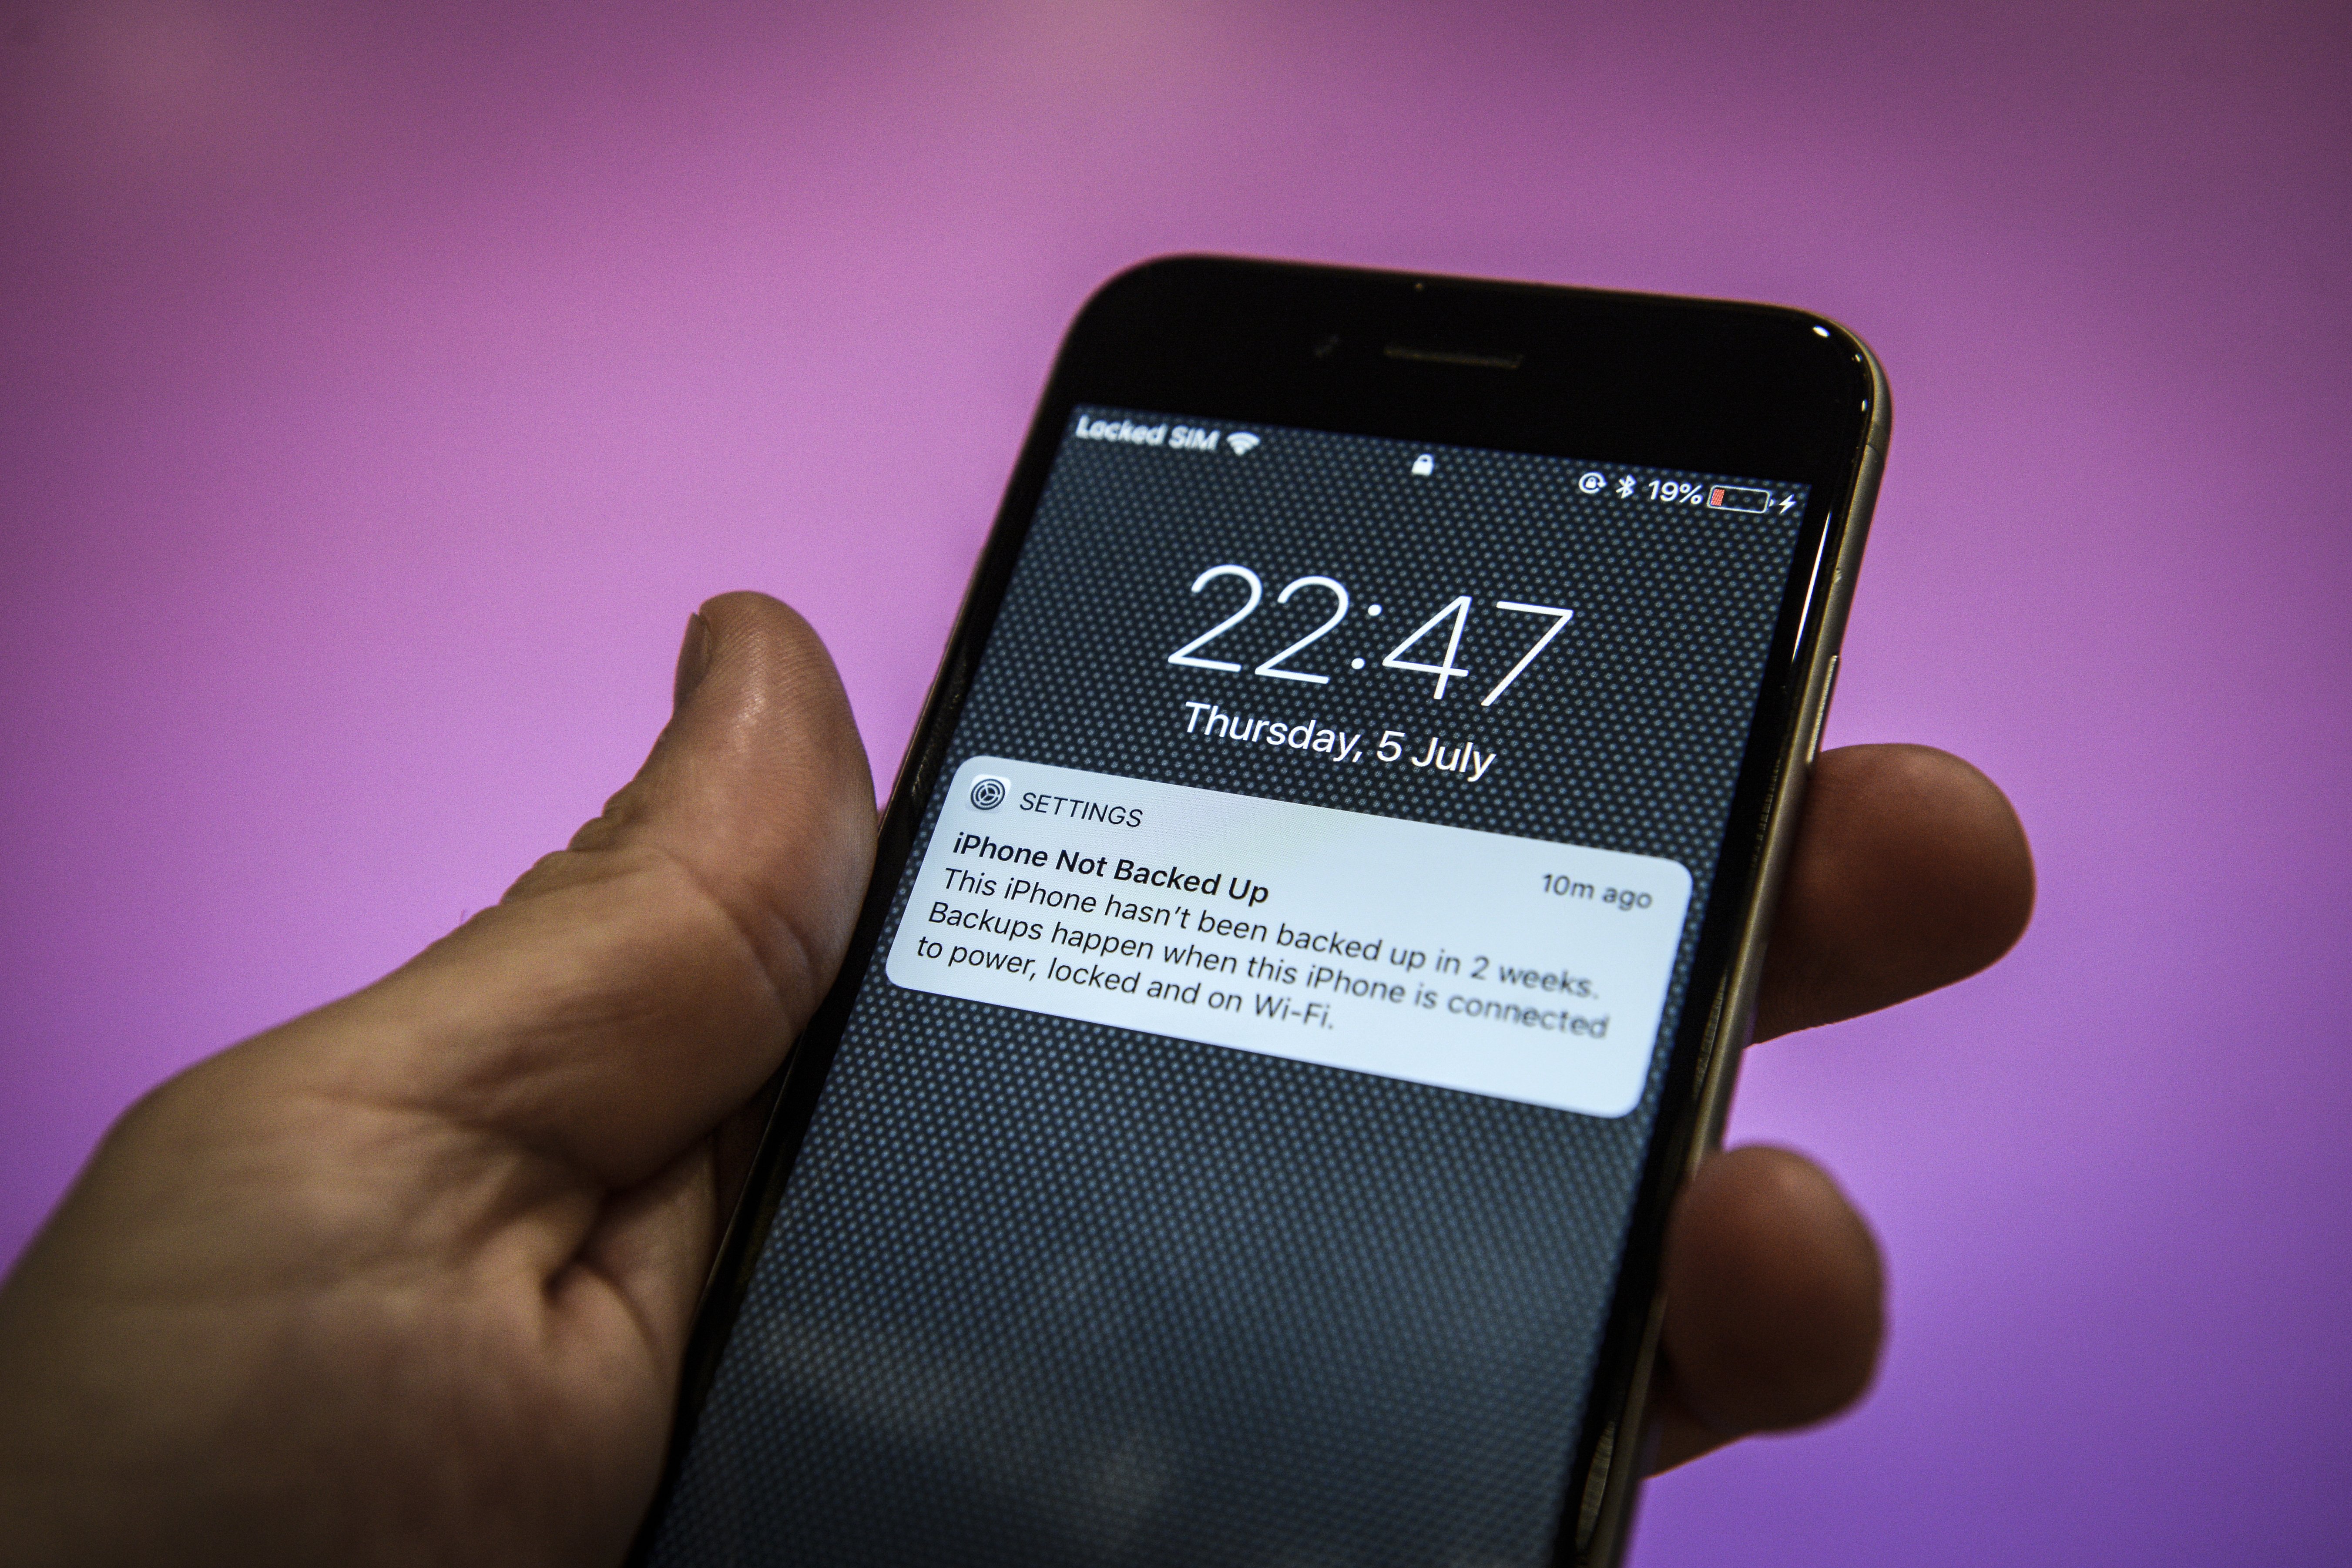
Need to backup your iPhone? As a rule of thumb, you should always backup your computer — and that same rule applies to your iPhone, too.
Trust us. We’ve lost data, files, and other digital media before by not regularly backing up our device. You never know when you’ll lose your iPhone.
Backing up your iPhone is easier than ever. In the early days of the iPhone, it use to be annoying to pull out the wire, connect your iPhone to your computer, and go through the iTunes backup process. Now, you can simply use iCloud.
How to backup iPhone
All it takes is the tap of a button to backup your iPhone now. And you can set up your device to automatically make regular backups, too. Let’s walk through this simple process.
1. Go to Settings and tap your Apple ID name at the top
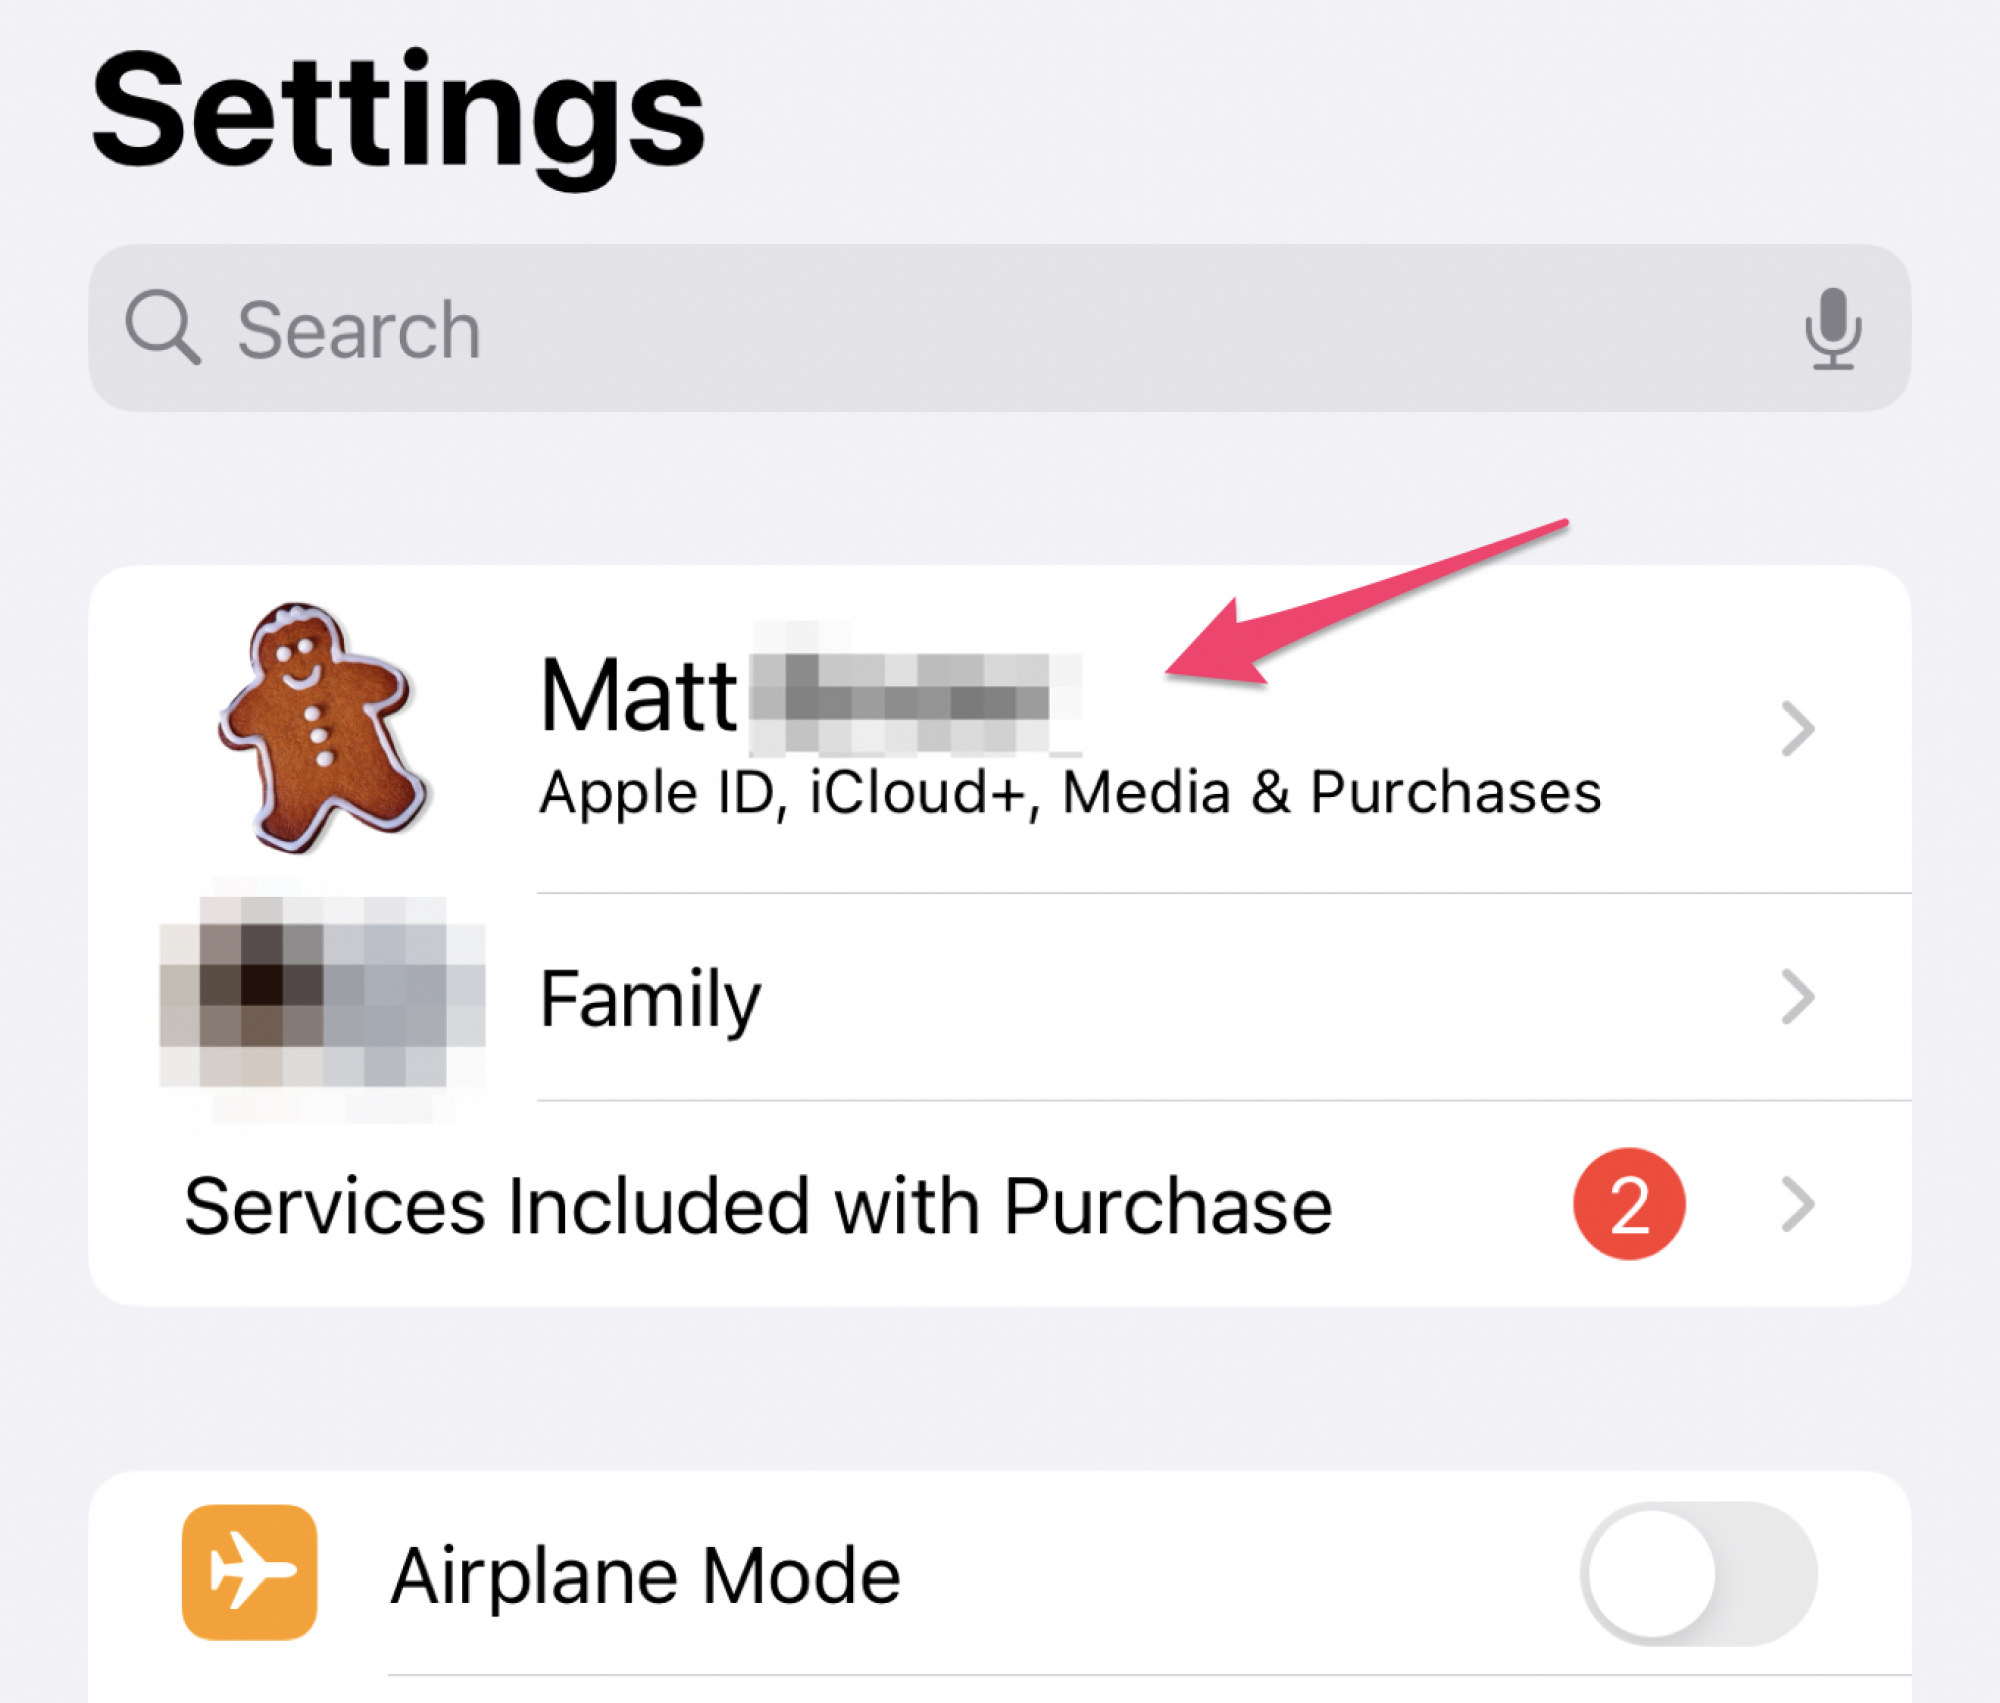
Credit: Matt Binder / Mashable screenshot
2. On the Apple ID screen, tap on iCloud.
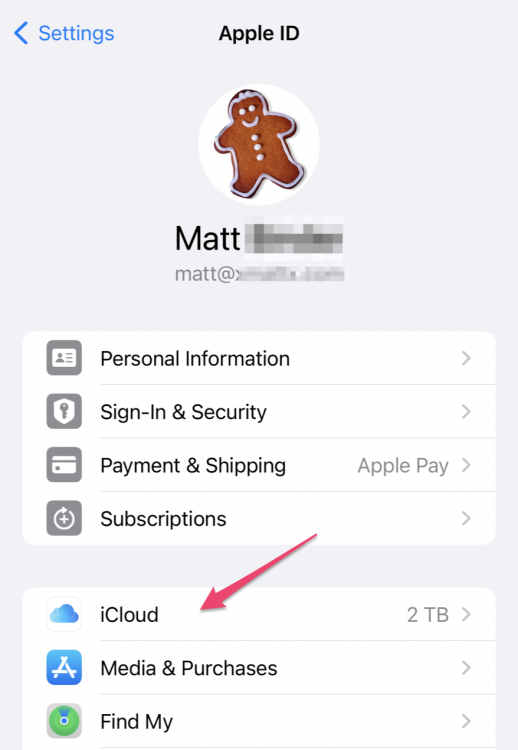
Credit: Matt Binder / Mashable screenshot
3. Under the Device Backups section, tap on iCloud Backup
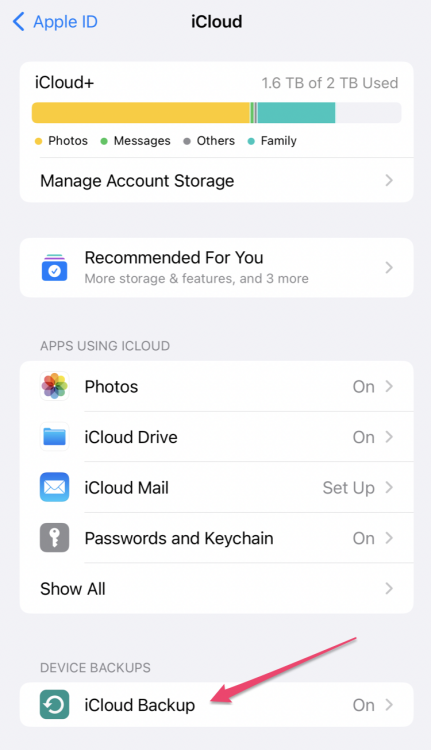
Credit: Matt Binder / Mashable screenshot
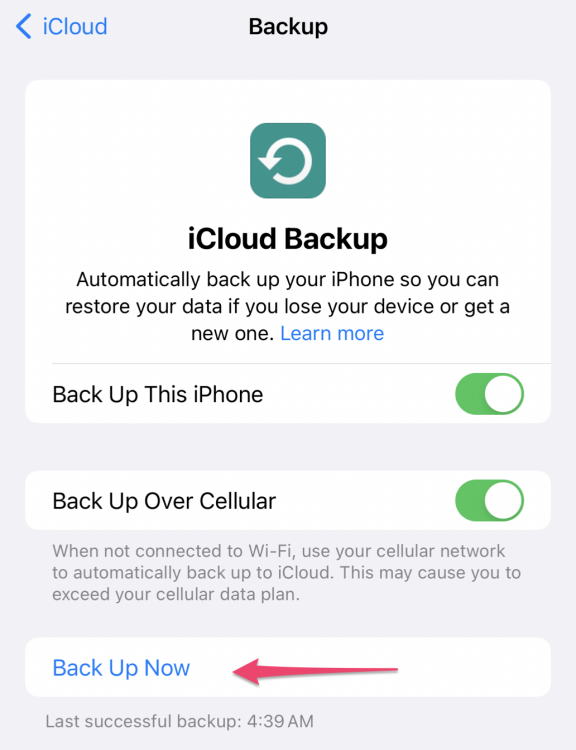
4. For automated backups, make sure the ‘Back Up This iPhone option’ is switched on.

Credit: Matt Binder / Mashable screenshot
5. To backup your iPhone immediately, tap on the ‘Back Up Now’ option.
Credit: Matt Binder / Mashable screenshot
Note: iCloud does not include photos and videos in your iPhone backup. Those media files are stored separately in iCloud Photos.
Apple gives iPhone users free 5GB of iCloud storage. For some users, this will be enough. For others, they’ll have to upgrade to an iCloud+ paid plan. Both your iPhone backup on iCloud and your iCloud Photos share the same storage space, so make sure you have an appropriately sized plan that has enough storage space for your photos and latest iPhone backup.