Battle of Leyte Gulf
2008/9 Schools Wikipedia Selection. Related subjects: World War II
|
||||||||||||||||||||||||||||||
|
||||||||||||||||||||||||||||||
The Battle of Leyte Gulf, also called the "Battle for Leyte Gulf", the "Battles for Leyte Gulf", and formerly as the "Second Battle of the Philippine Sea", is generally considered to be the largest naval battle of World War II and also, by some criteria, the largest naval battle in history.
It was fought in waters near to the Philippine island of Leyte, from 23 October to 26 October 1944, between Allied naval and naval-air forces and the naval and naval-air forces of the Empire of Japan. On October 20, United States troops invaded the island of Leyte as part of a strategy aimed at isolating Japan from the countries it had occupied in South East Asia, and in particular depriving its forces and industry of crucial oil supplies. The Imperial Japanese Navy (IJN) mobilized nearly all of its remaining major naval vessels in an attempt to defeat the Allied invasion, but was repulsed by the US Navy's 3rd and 7th Fleets. The IJN failed to achieve its objective, suffered very heavy losses, and never afterwards sailed to battle in comparable force. The majority of its surviving heavy ships, deprived of fuel, were to languish inactive in their bases for the rest of the Pacific War. (Fuller 1956, Morison 1956).
The Battle of Leyte Gulf included four major naval battles: the Battle of the Sibuyan Sea, the Battle of Surigao Strait, the Battle of Cape Engaño and the Battle off Samar, as well as other actions.
Leyte Gulf is also notable as the first battle in which Japanese aircraft carried out organized kamikaze attacks. (Fuller 1956, Morison 1956).
Background
The campaigns of August 1942 to early 1944 had driven Japanese forces from many of their island bases in the south and central Pacific, while isolating many of their other bases (most notably the bastion of Rabaul), and in June 1944 a series of Allied amphibious landings supported by the US Fifth Fleet's Fast Carrier Task Force captured the Northern Mariana Islands. This breached Japan's inner strategic ring of defences and gave the Allies a base from which American long range B-29 Superfortress bombers could operate against the Japanese home islands. The Japanese counterattacked in the Battle of the Philippine Sea in which the US Navy destroyed three Japanese aircraft carriers and approximately 600 Japanese aircraft, leaving the IJN with virtually no carrier-borne airpower. (Fuller 1956).
For subsequent operations, Admiral Ernest J. King and other members of the Joint Chiefs of Staff favored blockading Japanese forces in the Philippines and attacking Formosa to give the Allies control of the sea routes between Japan and southern Asia. General Douglas MacArthur favoured an invasion of the Philippines, which also lay across the supply lines to Japan. Leaving the Philippines in Japanese hands would be a blow to American prestige and an affront to the personal honour of General MacArthur, who in 1942 had famously pronounced 'I shall return'. Also, the considerable air power the Japanese had amassed in the Philippines was thought too dangerous to bypass by many high-ranking officers outside the Joint Chiefs of Staff, including Admiral Chester Nimitz. However, Nimitz and MacArthur initially had opposing plans, with Nimitz's plan initially centered on an invasion of Formosa, since that could also cut the supply lines to Southeast Asia. Formosa could also serve as a base for an invasion of mainland China, which MacArthur felt unnecessary. A meeting between MacArthur, Nimitz, and President Franklin Roosevelt helped confirm the Philippines as a strategic target, but had less to do with the final decision to invade the Philippines than sometimes claimed. Nimitz eventually changed his mind and agreed to MacArthur's plan. (Morison 1956, pp. 3–12).
Perhaps the most decisive consideration against the Formosa-China plan, as envisaged by Admiral King and others, was that the invasion of Formosa would require much larger ground forces than were available in the Pacific in late 1944, and would not have been feasible until the defeat of Germany had released the necessary additional Allied divisions for service in the east. (Morison 1956, pp. 3–12).
It was eventually decided that Macarthur's forces would invade the island of Leyte in the central Philippines. The amphibious forces and close naval support would be provided by the Seventh Fleet, commanded by Vice Admiral Thomas C. Kinkaid. Seventh Fleet at this time contained units of the Australian Navy, including the County Class heavy cruisers Shropshire and Australia, and the destroyer Arunta.
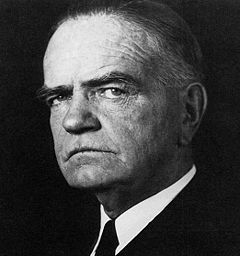
The Third Fleet, commanded by Admiral William F. Halsey, with Task Force 38 (the Fast Carrier Task Force, commanded by Vice Admiral Marc Mitscher) as its main component, would provide more distant cover and support for the invasion.
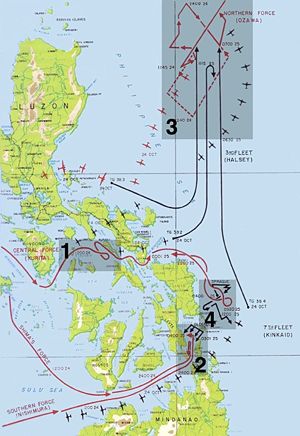
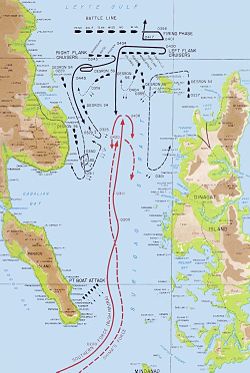
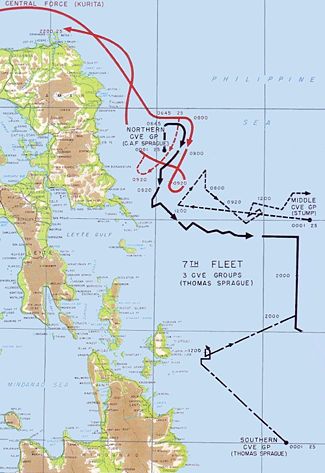
The four main actions in the battle of Leyte Gulf. 1 Battle of the Sibuyan Sea 2 Battle of Surigao Strait 3 Battle of (or 'off') Cape Engaño 4 Battle off Samar
|
A serious and fundamental defect in this plan was that there would be no overall allied naval commander for the coming operation. This lack of a unified command, along with failures in communication, was to produce a crisis, and very nearly a strategic disaster, for the Allied forces. (Fuller 1956, Morison 1956). By coincidence, the Japanese plan of using three separate fleets also provided no overall commander.
The Allied options were equally apparent to the Imperial Japanese Navy. Combined Fleet Chief Toyoda Soemu prepared four "victory" plans: Shō-Gō 1 (捷1号作戦 Shō ichigō sakusen) was a major naval operation in the Philippines, while Shō-Gō 2, Shō-Gō 3 and Shō-Gō 4 were responses to attacks on Formosa, the Ryukyu and Kurile Islands respectively. The plans were for complex offensive operations committing nearly all available forces to a decisive battle, and therefore of necessity substantially depleting Japan's slender reserves of oil fuel.
On 12 October 1944 the US Third Fleet under Admiral Halsey began a series of carrier raids against Formosa and the Ryuku Islands, with a view to ensuring that aircraft based there could not intervene in the Leyte landings. The Japanese command therefore put Shō-Gō 2 into action, launching waves of air attacks against Third Fleet's carriers. In what Morison refers to as a "knock-down, drag-out fight between carrier-based and land-based air" the Japanese were routed, losing 600 aircraft in three days, almost their entire air strength in the region. Following the American invasion of the Philippines, the Japanese Navy made the transition to Shō-Gō 1. (Fuller 1956, Morison 1956).
Shō-Gō 1 called for Vice-Admiral Jisaburō Ozawa's ships, known as Northern Force, to lure the main American covering forces away from Leyte. The Northern force would be built around several aircraft carriers, but these would be carrying very few aircraft or trained aircrew. The carriers would serve as the main bait. As the US covering forces were decoyed away by the Northern force two surface forces would advance on Leyte from the west. The Southern force under Admirals Nishimura and Shima would penetrate to the landing area via Surigao Strait. The Centre Force under Admiral Kurita, by far the most powerful of the attacking forces, would pass through San Bernardino Strait into the Philippine Sea, turn southwards, and then also attack the landing area. (Fuller 1956, Morison 1956).
This plan was likely to result in the destruction of one or more of the attacking forces, but Toyoda later explained this to his American interrogators as follows:
Should we lose in the Philippines operations, even though the fleet should be left, the shipping lane to the south would be completely cut off so that the fleet, if it should come back to Japanese waters, could not obtain its fuel supply. If it should remain in southern waters, it could not receive supplies of ammunition and arms. There would be no sense in saving the fleet at the expense of the loss of the Philippines.
- United States Strategic Bombing Survey (Pacific) - 'Interrogations of Japanese Officials'
(Main sources for this section: Woodward 1947, Fuller 1956, Morison 1956, Cutler 2001).
The submarine action in Palawan Passage (23 October)
(Note - this action is referred to by Morison as "The Fight in Palawan Passage" (Morison 1956), and is elsewhere occasionally referred to as "the Battle of Palawan Passage").
As it sortied from its base in Brunei Kurita's powerful "Centre Force" consisted of five battleships ( Yamato, Musashi, Nagato, Kongō, and Haruna), ten heavy cruisers ( Atago, Maya, Takao, Chōkai, Myōkō, Haguro, Kumano, Suzuya, Tone and Chikuma), two light cruisers ( Noshiro and Yahagi) and fifteen destroyers. (Morison 1956).
Kurita's ships passed Palawan Island at around midnight on 22-23 October. The American submarines Darter and Dace were positioned in company with each other on the surface close by. At 00:16 October 23 Darter's radar detected the Japanese formation at a range of 30,000 yards. Her captain promptly made visual contact. The two submarines quickly moved off in pursuit of the ships, while Darter made the first of three contact reports. At least one of these was picked up by a radio operator on Yamato, but Kurita failed to take appropriate anti-submarine precautions. (Morison 1956).
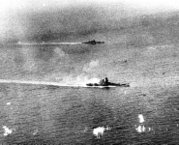
Darter and Dace - travelling on the surface at full power - after several hours gained a position ahead of Kurita's formation with the intention of making a submerged attack at first light. This attack was unusually successful. At 05:24 Darter fired a spread of six torpedoes, at least four of which hit Kurita's flagship, the heavy cruiser Atago. Ten minutes later Darter made two hits on the Atago's sister ship Takao with another spread of torpedoes. At 05:56 Dace made four torpedo hits on the heavy cruiser Maya (sister to Atago and Takao). (Morison 1956).
Atago and Maya quickly sank. Takao turned back to Brunei escorted by two destroyers - and followed by the two submarines. On 24 October, as the submarines continued to shadow the damaged cruiser, Darter grounded on the Bombay Shoal. All efforts to get her off failed, and she was abandoned. Her entire crew was, however, rescued by Dace.
Takao returned to Singapore, where she remained for the rest of the war.
Atago had sunk so rapidly that Kurita was forced to swim in order to survive. He was rescued by one of the Japanese destroyers, and he then transferred to the Yamato.
(Morison 1956, Cutler 2001, Hornfischer 2004).
The Battle of the Sibuyan Sea (24 October)
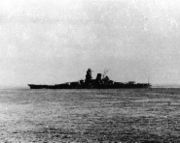
At about 08:00 on 24 October, the Centre Force was spotted and attacked entering the Sibuyan Sea by VF-20 squadron F6F Hellcat fighters, VB-20 Helldiver bombers, and VB-20 torpedo bombers from USS Enterprise of Halsey's Third Fleet. Despite its great strength Third Fleet was not well-placed to deal with the threat. On 22 October Halsey had detached two of his carrier groups to the fleet base at Ulithi to provision and rearm. When the Darter's contact report came in Halsey recalled Davison's group but allowed McCain, with the strongest of Task Force 38's carrier groups, to continue towards Ulithi. Halsey finally recalled McCain on 24 October - but the delay meant that the most powerful American carrier group played little part in the coming battle, and that Third Fleet was therefore effectively deprived of nearly 40% of its air strength for most of the battle. On the morning of 24 October only three groups were available to strike Kurita's force, and the one best positioned to do so - Bogan's Task Group 38.2 - was by mischance the weakest of the groups, containing only one large carrier - the Intrepid - and two light carriers. (The failure to promptly recall McCain on 23 October was also effectively to deprive Third Fleet, throughout the battle, of four of its six heavy cruisers). (Morison 1956).
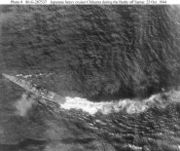
Planes from carriers Intrepid and Cabot of Bogan's group attacked at about 10:30, making hits on the battleships Nagato, Yamato, Musashi and severely damaging the heavy cruiser Myōkō. A second wave from USS Intrepid, Essex and Lexington later attacked, with SB2C Helldivers and F6F Hellcats from USS Essex Air Group 15, scoring another 10 hits on Musashi. As she withdrew, listing to port, a third wave from Enterprise and Franklin hit her with eleven bombs and eight torpedoes. (Morison 1956).
Kurita turned his fleet around to get out of range of the aircraft, passing the crippled Musashi as his force retreated. He waited until 17:15 before turning around again to head for the San Bernardino Strait - Musashi capsized and sank at about 19:30. (Morison 1956).
Meanwhile, Vice-Admiral Takijirō Ōnishi had directed three waves of aircraft from his First Air Fleet based on Luzon against the carriers of Rear Admiral Sherman's Task Group 38.3 (whose aircraft were also being used to strike airfields in Luzon to prevent Japanese land-based air attacks on Allied shipping in Leyte Gulf). Each of Ōnishi's strike waves consisted of some fifty to sixty aircraft. (Morison 1956).
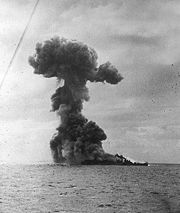
Most of the attacking Japanese planes were intercepted and shot down - or else driven off - by Grumman F6F Hellcats of Sherman's combat air patrol, most notably by two fighter sections from Essex led by Commander David McCampbell (who is credited with shooting down nine of the attacking planes in this one action). However, one Japanese aircraft (a Yokosuka D4Y Judy) slipped through the defences, and at 09:38 hit the light carrier USS Princeton with a 250-kg armor-piercing bomb. This caused a severe fire in the Princeton's hangar. Her emergency sprinkler system failed to operate, and fires spread rapidly. A series of explosions followed. The fires were gradually brought under control, but at 15:23 there was an enormous explosion (probably in the carrier's bomb stowage aft), causing more casualties aboard Princeton, and even heavier casualties - more than 300 - aboard the cruiser USS Birmingham which was coming back alongside to assist with the firefighting. Birmingham was so badly damaged that she was forced to retire. Other nearby vessels were also damaged. All efforts to save Princeton failed, and she was finally scuttled - torpedoed by the light cruiser Reno - at 17:50. (Morison 1956).
In all Third Fleet flew 259 sorties against Centre Force on 24 October, and most of these were by Grumman F6F fighter-bombers. This weight of attack was not nearly sufficient to neutralize the threat from Kurita. It contrasts with the 527 sorties flown by Third Fleet against Ozawa's much weaker Northern Force on the following day. Moreover a large proportion of the Sibuyan Sea attack was directed against one ship, the Musashi. This great battleship was eliminated, and the cruiser Myōkō crippled, but every other ship in Kurita's force remained battleworthy and able to advance. (Morison 1956).
As a result of the momentous decision now taken by Admiral Halsey, Kurita was able to proceed through San Bernardino Strait during the night, to make an unexpected and dramatic appearance off the coast of Samar on the following morning.
(Sources for this section: Woodward 1947, Fuller 1956, Morison 1956, Cutler 2001).
Task Force 34 / San Bernardino Strait
After the Japanese Southern and Centre forces had been detected , but before Ozawa's carriers had been located, Halsey and the staff of Third Fleet, aboard the battleship New Jersey, prepared a contingency plan to deal with the threat from Kurita's Centre Force. Their intention was to cover San Bernardino Strait with a powerful task force of fast battleships supported by two of the Third Fleet's fast carrier groups. The battleship force was to be designated Task Force 34 and to consist of 4 battleships, 5 cruisers and 14 destroyers under the command of Vice Admiral Willis A. Lee. Rear Admiral Ralph E. Davison of Task Group 38.4 was to be in overall command of the supporting carrier groups.
At 15:12 on 24 October Halsey sent a radio message to his subordinate task group commanders, giving details of this contingency plan :
"BATDIV 7 MIAMI, VINCENNES, BILOXI, DESRON 52 LESS STEVEN POTTER, FROM TG 38.2 AND WASHINGTON, ALABAMA, WICHITA, NEW ORLEANS, DESDIV 100, PATTERSON, BAGLEY FROM TG 38.4 WILL BE FORMED AS TASK FORCE 34 UNDER VICE ADMIRAL LEE, COMMANDER BATTLE LINE. TF 34 TO ENGAGE DECISIVELY AT LONG RANGES. CTG 38.4 CONDUCT CARRIERS OF TG 38.2 AND TG 38.4 CLEAR OF SURFACE FIGHTING. INSTRUCTIONS FOR TG 38.3 AND TG 38.1 LATER. HALSEY, OTC IN NEW JERSEY." (Morison 1956. Emphasis added by contributor).
This message was also picked up by Seventh Fleet, and by Admiral Nimitz' Pacific Fleet headquarters. Task Force 34 was, however, not formed off San Bernardino Strait as envisaged. The intercepted message was to lead to a disastrous misunderstanding, and to have a profound influence on the subsequent course of the battle.
(Morison 1956).
Halsey's Decision (24 October)
Third Fleet's aircraft failed to locate Ozawa's Northern (decoy) force until 16:40 on 24 October. This was largely because Third Fleet had been preoccupied with attacking Kurita and defending itself against the Japanese air strikes from Luzon. On the evening of 24 October Ozawa intercepted a (mistaken) American communication describing Kurita's withdrawal, and he therefore began to withdraw too. However, at 20:00 Toyoda Soemu ordered all his forces to attack "counting on divine assistance". Ozawa reversed course again and headed southwards towards Leyte.
Halsey was convinced that the Northern Force constituted the main Japanese threat, and he was determined to seize what he saw as a golden opportunity to destroy Japan's remaining carrier strength. Believing that the Centre Force had been neutralized by Third Fleet's air strikes earlier in the day in the Sibuyan Sea, and that its remnants were retiring, Halsey radioed (to Nimitz and Kinkaid):
"CENTRAL FORCE HEAVILY DAMAGED ACCORDING TO STRIKE REPORTS.
AM PROCEEDING NORTH WITH THREE GROUPS TO ATTACK CARRIER FORCES AT DAWN"
(Morison 1956 - Emphasis added by contributor).
The words "with three groups" were to prove dangerously misleading. In the light of the intercepted 15:12 24 October " . . will be formed as Task Force 34" message from Halsey, Admiral Kinkaid and his staff assumed, as did Admiral Nimitz at Pacific Fleet headquarters, that Task Force 34, commanded by Lee, had now been formed. They supposed that Halsey was leaving this powerful surface force guarding San Bernardino Strait (and covering Seventh Fleet's northern flank) while he took his three available carrier groups northwards in pursuit of the Japanese carriers. But Task Force 34 had not yet been formed, and Lee's battleships were on their way northwards with the Third Fleet's carriers. Halsey had consciously and deliberately left San Bernardino Strait absolutely unguarded. As Woodward wrote "Everything was pulled out from San Bernardino Strait. Not so much as a picket destroyer was left". (Woodward 1947).
Halsey and his staff officers resolutely ignored information from a night reconnaissance aircraft operating from the light carrier USS Independence that Kurita's powerful surface force had turned back towards San Bernardino Strait, and that after a long blackout the navigation lights in the Strait had been turned on. When Rear Admiral Gerald F. Bogan, commanding TG 38.2, radioed this information to Halsey's flagship, he was rebuffed by a staff officer, who tersely replied "Yes, yes, we have that information." Vice Admiral Lee, who had correctly deduced that Ozawa's force was on a decoy mission and indicated this in a blinker message to Halsey's flagship, was similarly rebuffed. Commodore Arleigh Burke and Commander James Flatley of Vice Admiral Marc Mitscher's staff had come to the same conclusion. They were sufficiently worried about the situation to wake Mitscher, who asked "Does Admiral Halsey have that report?" On being told that Halsey did, Mitscher, knowing too well Halsey's temperament, commented "If he wants my advice he'll ask for it" and went back to sleep. (Morison 1956)
The entire available strength of Third Fleet - some 65 ships, constituting the most powerful naval force on the planet - continued to steam northwards, away from San Bernardino Strait.
(Woodward 1947, Fuller 1956, Morison 1956).
The Battle of Surigao Strait (25 October)
Nishimura's "Southern Force" consisted of the battleships Yamashiro and Fusō, the heavy cruiser Mogami, and four destroyers. They were attacked by bombers on 24 October but sustained only minor damage.
Because of the strict radio silence imposed on the Centre and Southern Forces, Nishimura was unable to synchronise his movements with Shima and Kurita. When he entered the narrow Surigao Strait at about 02:00 Shima was 25 miles (40 km) behind him, and Kurita was still in the Sibuyan Sea, several hours from the beaches at Leyte.
As the Southern Force approached Surigao Strait, it ran into a deadly trap set by the 7th Fleet Support Force. Rear Admiral Jesse Oldendorf had six battleships ( West Virginia, Maryland, Mississippi, Tennessee, California, and Pennsylvania, all but the Mississippi having been sunk or damaged in the attack on Pearl Harbour), eight cruisers (heavy cruisers USS Louisville ( Flagship), Portland, Minneapolis and HMAS Shropshire, light cruisers USS Denver, Columbia, Phoenix, Boise), 28 destroyers and 39 motor torpedo boats (Patrol/Torpedo (PT) boats). To pass through the narrows and reach the invasion shipping, Nishimura would have to run the gauntlet of torpedoes from the PT boats followed by the large force of destroyers, and then advance under the concentrated fire of the six battleships and their eight flanking cruisers disposed across the far mouth of the Strait. (Morison 1956).
At 22:36 one of the motor torpedo-boats, PT-131, made the first contact on the approaching Japanese ships. Over more than three-and-a-half hours the torpedo-boats made repeated attacks on Nishimura's force, but without making any torpedo hits. However, they made contact reports which were of use to Oldendorf and his force. (Morison 1956).
As Nishimura's ships entered Surigao Strait they received devastating torpedo attacks from the American destroyers disposed on both sides of their line of advance. At about 03:00 both Japanese battleships were hit by torpedoes. The Yamashiro was able to steam on, but the Fusō exploded and broke in two. Three of Nishimura's four destroyers were also hit, and two of these sank. The third, Asagumo, was able to retire but later sank (Morison 1956).
At 03:16, USS West Virginia’s radar picked up the surviving ships of Nishimura's force at a range of 42,000 yards (38 km) and had achieved a firing solution at 30,000 yards (27 km). West Virginia tracked them as they approached in the pitch black night. At 03:53, she unleashed the eight 16 inch (406 mm) guns of her main battery at a range of 22,800 yards (21 km), striking the Yamashiro with her first salvo. She went on to fire a total of 93 of her heavy shells. At 03:55 California and Tennessee joined in, firing respectively a total of 69 and 63 14-inch shells. Radar fire control allowed these American battleships to hit targets from a distance at which the Japanese battleships, with their inferior fire control systems, could not return fire. (Morison 1956, Howard 1999).
The other three US battleships, equipped with less advanced gunnery radar, had difficulty arriving at a firing solution. Maryland eventually succeeded in visually ranging on the splashes of the other battleships' shells, and then fired a total of 48 16-inch projectiles. Pennsylvania was unable to find a target and her guns remained silent. (Morison 1956).
Mississippi only obtained a solution at the end of the battle-line action, and then fired just one (full) salvo of twelve 14-inch shells. This was the last salvo to be fired by any of the American battleships in this engagement, and the last ever to be fired by a battleship against another heavy ship. This was, therefore, to be the end of an era in naval history. (Morison 1956).
Yamashiro and Mogami were crippled by a combination of 16-inch (406 mm) and 14-inch (356 mm) armor-piercing shells, as well as the fire of Oldendorf's flanking cruisers. Shigure turned and fled but lost steering and stopped dead. Yamashiro sank at about 04:20, with Nishimura on board. Mogami and Shigure retreated southwards down the Strait.
The rear of the Southern Force, the "Second Striking Force" commanded by Vice Admiral Shima, had approached Surigao Strait about 40 miles astern of Nishimura. It too came under attack from the PT boats, and one of these hit the light cruiser Abukuma with a torpedo which crippled her and caused her to fall out of formation. Shima's two heavy cruisers ( Nachi and Ashigara) and eight destroyers next encountered remnants of Nishimura's force. Seeing what he thought were the wrecks of both Nishimura's battleships (actually the two halves of Fusō), Shima ordered a retreat. His flagship, Nachi, collided with Mogami, flooding the latter's steering-room. Mogami fell behind in the retreat and was sunk by aircraft the next morning. The bow half of Fusō was destroyed by Louisville, and the stern half sank off Kanihaan Island. Of Nishimura's seven ships, only Shigure survived. (Morison 1956, Howard 1999).
The Battle of Surigao Strait was the last battle-line action in history - Yamashiro and her American opponents were the last battleships to engage another battleship in combat. If Yamashiro was sunk by battleship fire alone (which is unlikely), then she was one of only two during the Second World War for which this may be claimed (the other being the Kongō-class battleship Kirishima, in the Battle of Guadalcanal). However, Yamashiro had been hit by as many as four torpedoes from American destroyers, and Kirishima was scuttled because the US battleship Washington's gunfire had wrecked her steering and left her in a hopeless position. (Samuel Eliot Morison "History of US Naval Operations in World War II, Vol. 5, The Struggle for Guadalcanal, August 1942 – February 1943" (Little Brown & Co, Boston, 1949)).
It is in fact doubtful whether during World War Two any battleship was sunk by gunfire alone, with the exception of the French battleship Bretagne which was sunk during the Attack on Mers-el-Kébir (although the battlecruiser HMS Hood was destroyed by gunfire in the Battle of the Denmark Strait).
Surigao Strait was also the last battle in which one force (the Americans, in this case) was able to "cross the T" of its opponent. However, by the time the battleship action was joined the Japanese line was very ragged and consisted of only one battleship (Yamashiro), one heavy cruiser and one destroyer. Thus the "crossing of the T" which took place on this occasion was scarcely more than notional - a purely academic "crossing of the T" - and it had little or no effect on the outcome of the battle. (Morison 1956, Howard 1999).
(Sources for this section: Woodward 1947, Fuller 1956, Morison 1956, Howard 1999, Cutler 2001, Hornfischer 2004).
The Battle off Samar (25 October)
Kurita's Centre Force exits San Bernadino Strait - unopposed
Halsey's decision to take all the available strength of Third Fleet northwards to attack the carriers of the Japanese Northern Force had left San Bernardino Strait completely unguarded.
It had been generally assumed by senior officers in Seventh Fleet (including Kinkaid and his staff) that Halsey was taking his three available carrier groups northwards (McCain's group, the strongest in Third Fleet, was still returning from the direction of Ulithi) but leaving the battleships of Task Force 34 covering San Bernardino Strait against the Japanese Centre Force. In fact Halsey had not yet formed Task Force 34, and all six of Willis Lee's battleships were on their way northwards with the carriers, as were every available cruiser and destroyer of the Third Fleet.
Kurita's Centre Force was therefore able to emerge unopposed from San Bernardino Strait at 0300 on 25 October and steam southwards along the coast of Samar, hoping that Halsey had taken the bait and led his fleet away - a hope that proved to have been startlingly fulfilled.
(Sources for this subsection: Woodward 1947, Fuller 1956, Morison 1956, Cutler 2001, Hornfischer 2004).
The opposing forces
In the path of Centre Force as it advanced towards Leyte Gulf, were the Seventh Fleet's three escort carrier units. These contained a total of sixteen small escort carriers, with their screens of lightly armed (and entirely unarmoured) destroyers and smaller 'destroyer escorts'.
Each escort carrier carried on average about 28 planes. The sixteen carriers of the three groups therefore had available some 450 aircraft in all. The overwhelming majority of these were FM-2 Wildcat fighters or TBM Avenger torpedo-bombers. The ordnance held by the escort carriers for these aircraft was intended primarily for defence against air attack, for anti-submarine operations, or for missions in support of the ground forces on Leyte.
The carriers' magazines were therefore dominated by .50 caliber machine-gun ammunition, depth charges, rockets and small general-purpose fragmentation bombs. There were however a few torpedoes.
The escort carriers were by their nature very slow and lightly armored and would normally be expected to stand little chance in an encounter with a battleship or heavy cruiser. They were, however, accompanied by their screens of destroyers and destroyer escorts. (These small vessels were facetiously but affectionately known in the US Navy as "tin cans"). (Hornfischer 2004).
At this stage, despite the losses in the Palawan Passage and Sibuyan Sea actions Centre Force was still very powerful, consisting of 4 battleships (including the giant Yamato), 6 heavy cruisers, 2 light cruisers and a dozen destroyers. With the exception of Task Force 34 this was still probably the most powerful surface force in the world, although perhaps roughly comparable in strength with Oldendorf's Fire Support Group in Seventh Fleet.
(Sources for this subsection: Woodward 1947, Fuller 1956, Morison 1956, Cutler 2001, Hornfischer 2004).
Initial contact / The start of the action
Kurita's force first encountered Clifton Sprague's Task Unit 77.4.3, call sign 'Taffy 3'. The surprise was almost absolute. The escort carriers' first intimation of the threat was a report from a TBM Avenger on anti-submarine patrol to the north, piloted by Ensign W. Brooks, who at 0643 sent the following radio message:
- "ENEMY SURFACE FORCE OF FOUR BATTLESHIPS, FOUR HEAVY CRUISERS, TWO LIGHT CRUISERS, AND TEN TO TWELVE DESTROYERS SIGHTED TWENTY MILES NORTHWEST OF YOUR TASK GROUP AND CLOSING IN ON YOU AT THIRTY KNOTS"
- (Hornfischer 2004).
It was at first assumed that the aircrew had mistaken Task Force 34 for the enemy. Ensign Brooks was asked to check his identification of the ships. He flew lower, and at 06:47 signalled:
- "I CAN SEE THE PAGODA MASTS . . "
- (Hornfischer 2004).
Within minutes crewmen on the ships of Taffy 3 could also see those pagoda masts - rising above the horizon. Shortly afterwards they saw vivid flashes as the Japanese battleships opened fire at extreme range.
Kurita, mistaking the flattops ahead of him for fleet carriers of the Essex Class, therefore believed that he had the main body of the US Third Fleet under his guns. At this point it probably seemed to him that he had thus been given an unprecedented, and golden, opportunity.
When his task unit came under attack, Rear Admiral Clifton Sprague directed his carriers to turn and launch their planes, then make for the cover of a rain squall to the east. He ordered the destroyers and DEs to make a smoke screen to conceal the retreating carriers. As they did so they drew heavy fire.
The unequal nature of the battle may be conveyed by the fact that Yamato - the largest and most powerful battleship ever to see surface combat - alone displaced as much as all of Taffy 3's ships put together.
(Sources for this subsection: Morison 1956, Cutler 2001, Hornfischer 2004).
Johnston's counterattack
Concerned about the threat from the incoming fire, Lieutenant Commander Ernest E. Evans, commanding officer of the destroyer USS Johnston, the ship closest to the Japanese formation, suddenly took his destroyer in a direct attack on the enemy force. Johnston was a 2100-ton vessel of the Fletcher Class, armed with five 5-inch (127 mm) guns, 40mm and 20mm light anti-aircraft guns, and ten 21-inch Mark-15 torpedoes. It was only with the torpedoes that she stood any serious chance of inflicting crippling damage on an enemy battleship.
Weaving to avoid the shells, steering towards their splashes, Johnston advanced on the heavy cruiser Kumano, flagship of Vice Admiral Shiraishi's Cruiser Division 7, to make a torpedo attack. When she was 10 miles (17 km) from Kumano, her 5-inch (127 mm) guns rained shells on the cruiser's bridge and upper deck (where they could do some damage, whereas they would not penetrate the armor of the ship's hull). Johnston closed in and then launched all ten of her torpedoes, making a hit which blew the bow off Kumano and also took her sister cruiser Suzuya out of the fight as she stopped to assist.
From seven miles (11 km) away, the battleship Kongō sent a 14-inch shell through the Johnston’s upper deck and engine room. Johnston’s speed was cut to less than half, while the after gun turrets lost power. Then three 6-inch shells, possibly from Yamato’s secondary batteries, struck Johnston’s bridge, killing many, and wounding Commander Evans. The bridge was abandoned, and Evans then steered the ship from the aft steering column.
Encouraged by the Johnston's attack, Sprague had given the order "small boys attack", sending Taffy 3's other destroyers into the assault. Meanwhile Johnston's damage-control teams were able to restore power to two of the three after turrets, and Evans then turned Johnston around, re-entering the fight.
(Morison 1956, Hornfischer 2004).
Hoel and Heermann counterattack
Taffy 3's two other destroyers - Hoel and Heermann - now attacked the Japanese line with suicidal determination, drawing fire and disrupting the Japanese formation as ships turned to avoid torpedoes. The Yamato found herself threatened by two spreads of torpedoes probably launched from Heermann. Instead of turning her towards the torpedoes and attempting to 'comb' their tracks, her commanding officer (Rear Admiral Ugaki) was ordered by Kurita to turn away, and for ten minutes she steamed northwards, away from the battle, unable to turn back for fear of presenting her beam to the torpedoes. Heermann, meanwhile, closed with the other Japanese battleships, advancing so close to her targets that they could not fire, either due to the inability to depress their main guns sufficiently, or else for fear of hitting their own ships.
Hoel had closed with the nearest enemy battleship, Kongō, and fired a spread of torpedoes at a range of 9,000 yards (8.2 km). Kongō was, like Yamato, forced to turn away for several minutes. Hoel was quickly hit and disabled. Nonetheless she engaged a group of heavy cruisers, closing with their leader, Haguro, and launching her remaining torpedoes. She is thought to have made at least one hit. The destroyer was now surrounded and overwhelmed by the fire of Kongō and the heavy cruisers. She sank at 08:55.
253 of Hoel's crew died with their ship. Commander Kinterberger observed 'Fully cognizant of the inevitable result of engaging such vastly superior forces, these men performed their assigned duties coolly and efficiently until their ship was shot from under them.'
(Morison 1956, Hornfischer 2004).
Samuel B. Roberts counterattacks
At 07:35, the destroyer escort USS Samuel B. Roberts turned and headed towards the Japanese ships. She had only two 5-inch (127 mm) guns and three torpedoes, compared with five and ten respectively on the full-sized destroyers. Nonetheless she unflinchingly attacked the heavy cruiser Chōkai. With smoke as cover, the Roberts steamed to within two and a half miles (4 km) of the cruiser. Once within range Roberts launched her three torpedoes, scoring a hit. She then fought with the Japanese ships for an hour, firing over 600 5-inch shells, and raking the enemy upperworks with her light anti-aircraft guns. At 08:51 the Japanese finally made two hits, the second of which destroyed the aft gun turret. With her remaining 5-inch (127 mm) gun, she set the bridge of the cruiser Chikuma on fire, before being hit by three 14 inch shells from the Kongō. At 09:35 the order was given to abandon ship, and Roberts sank 30 minutes later, with the loss of 89 of her crew.
(Morison 1956, Hornfischer 2004).
Air counterattacks, escort carriers under fire - Gambier Bay sinks
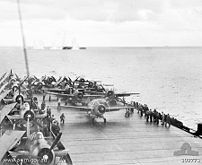
Meanwhile, Thomas Sprague had ordered his three task units to launch their aircraft equipped with whatever weapons they had available, even if these were only machine guns or depth charges. After many aircraft expended their ammunition they made dry runs to threaten and distract the Japanese warships and their gunners.
The air counterattacks were almost unceasing, and some, especially several of the strikes launched from Stump's task unit 77.4.2, were relatively heavy. Serious damage was done to many of the Japanese ships. Two of Kurita's heavy cruisers - Chikuma and Suzuya - were destroyed as a result of this onslaught, mainly by the efforts of torpedo-carrying TBM Avengers. Air attack (this time with 500-pound bombs) also played a part in the destruction of a third, the Chōkai.
The carriers of Taffy 3 had turned south and retreated through the shellfire. For much of the action Kurita's ships were using armor-piercing (AP) shells which passed through the thin-skinned escort carriers without detonating. A change to High Explosive (HE) shells resulted in the Gambier Bay, at the rear of the American formation, being holed, slowed, and finally sunk, while most of the other carriers were damaged. Even so their single stern-mounted five-inch (127 mm) guns were returning fire, and with some effect.
(Morison 1956, Hornfischer 2004).
The End of Johnston
The tide eventually turned against Taffy 3's destroyers. Two hours into the attack, Comdr. Evans aboard the Johnston - spotting a line of four destroyers led by the light cruiser Yahagi making a torpedo attack on the fleeing carriers - moved to intercept them. Johnston poured fire on the attacking group, forcing them to launch their torpedoes prematurely, missing the carriers. Their gunfire then turned to the weaving Johnston. At 09:10 the Japanese made a direct hit on one of her forward turrets, knocking it out and setting off many of the stored 5-inch shells. Her damaged engines stopped, leaving her dead in the water. The Japanese destroyers closed in on this sitting target, and the Johnston was hit so many times that one survivor recalled 'they couldn't patch holes fast enough to keep her afloat'. At 09:45 Comdr. Evans finally gave the order to abandon ship. The Johnston sank 25 minutes later with the loss of 186 of her crew. Commander Evans abandoned ship with his crew, but was never seen again. He was posthumously awarded the Medal of Honour.
(Morison 1956, Hornfischer 2004).
The surface action ends, Kurita withdraws - and escapes
At 09:20 - just as it seemed the end was near for Taffy 3, and probably for the other escort carrier units as well - Kurita suddenly broke off the fight and, giving the order 'all ships, my course north, speed 20', retreated towards San Bernadino Strait. Some of his ships were not seriously damaged, but the air and destroyer attacks had broken up his formations and he had lost control of the battle. Three of his heavy cruisers had been sunk, and the determined resistance had convinced him that persisting with his attack would only cause him further losses. Almost all of his surviving force succeeded in making their escape through San Bernadino Strait - Halsey and the Third Fleet battleships arrived too late to cut him off. Nagato, Haruna and Kongō had been severely damaged by the torpedoes of Taffy 3's escorts. Kurita had begun the battle with five battleships. On their return to their bases, only Yamato remained battle-worthy.
(Morison 1956, Hornfischer 2004).
Kamikaze attack
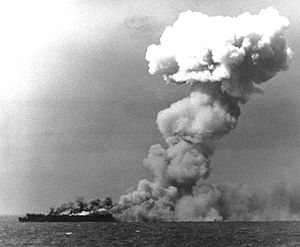
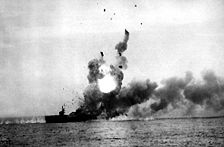
As the desperate surface action was coming to an end Vice Admiral Takijirō Ōnishi had put his 'Special Attack Force' into operation, launching kamikaze attacks against the Allied ships in Leyte Gulf and the escort carrier units off Samar. At 10:51 St. Lo of Taffy 3 was hit by a kamikaze aircraft. Its bomb detonated, causing gasoline fires and a series of explosions. St. Lo sank at around 11:20.
(Morison 1956, Hornfischer 2004).
Losses
Two escort carriers, the destroyers Hoel and Johnston, and the destroyer escort Samuel B. Roberts had been sunk - four other American ships were damaged. The destroyer Heermann, despite her unequal fight with the enemy force, finished the battle with only six of her crew dead.
As a result of communication errors and other failures, a very large number of survivors from Taffy 3 were not rescued for several days. Many died unnecessarily as a consequence of this long delay.
In total over one thousand sailors and aircrew of the escort carrier units were lost.
(Morison 1956, Hornfischer 2004).
The Battle of/off Cape Engaño (25-26 October)
Ozawa's "Northern Force" contained four aircraft carriers ( Zuikaku – the last survivor of the six carriers which had attacked Pearl Harbour in 1941 – the light carriers Zuihō, Chitose, and Chiyoda), two World War I battleships partially converted to carriers ( Hyūga and Ise — the two after turrets had been replaced by a hangar, aircraft handling deck and catapult, but neither battleship carried any aircraft in this battle), three light cruisers ( Ōyodo, Tama, and Isuzu), and nine destroyers. His force had only 108 aircraft in all. (Morison 1956).
Ozawa's force was not located until 16:40 on 24 October, largely because Sherman's Task Group 38.3, which as the northernmost of Halsey's groups was responsible for searches in this sector, had been too involved with attacking Kurita and defending itself against the air strikes from Luzon. On the evening of 24 October Ozawa intercepted an American signal describing Kurita's withdrawal. He therefore began to withdraw his force as well, but at 20:00 Toyoda Soemu ordered all forces to the attack, 'counting on divine assistance'. Ozawa therefore turned southwards again - towards Third Fleet.
Halsey was convinced that the Northern Force was the main threat, and was determined to seize what he saw as an almost perfect opportunity to destroy Japan's remaining carrier strength. Believing that the Japanese Centre Force had been neutralized by Third Fleet's air strikes on 24 October in the Battle of the Sibuyan Sea, and that its remnants were retiring to Brunei, Halsey radioed "Central Force heavily damaged according to strike reports. Am proceeding north with three groups to attack carrier forces at dawn." (Morison 1956).
The force which Halsey was taking north with him - three groups of Mitscher's Task Force 38 - was overwhelmingly stronger than the Japanese Northern Force. Between them these groups had five large fleet carriers ( Intrepid, Franklin, Lexington, Enterprise, and Essex), five light fleet carriers ( Independence, Belleau Wood, Langley, Cabot, and San Jacinto), six battleships ( Alabama, Iowa, Massachusetts, New Jersey, South Dakota, and Washington), eight cruisers (two heavy and six light), and more than forty destroyers. The air groups of the ten US carriers present contained a total of more than six hundred aircraft. (Morison 1956).
At 02:40 on 25 October Halsey 'officially' formed Task Force 34, built around the Third Fleet's six battleships and commanded by Vice Admiral Lee. As the dawn approached the ships of Task Force 34 drew ahead of the carrier groups. Halsey's intention was follow up Mitscher's initial air strikes with the heavy gunfire of Lee's battleships. (Morison 1956).
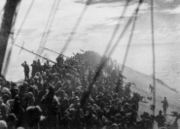
Around dawn on 25 October Ozawa launched 75 aircraft to attack the Third Fleet. Most of these were shot down by the American combat air patrols, and no damage was done to the US ships. A handful of surviving Japanese planes made their way to land bases on Luzon.
During the night Halsey had passed tactical command of Task Force 38 to Admiral Marc Mitscher, who ordered the American carrier groups to launch their first strike wave, of 180 aircraft, at dawn - before the Northern Force had been located. When the search aircraft made contact at 07:10 this strike wave was orbiting ahead of the task force. At 08:00, as the attack went in, its escorting fighters destroyed Ozawa's combat air patrol of about 30 planes. The US air strikes continued until the evening, by which time Task Force 38 had flown 527 sorties against the Northern Force, sinking Zuikaku, the light carriers Chiyoda and Zuihō, and the destroyer Akitsuki. Chiyoda was lost with all hands. The light carrier Chitose was crippled, as was the cruiser Tama. Ozawa transferred his flag to the light cruiser Ōyodo.
(Woodward 1947, Fuller 1956, Morison 1956, Cutler 2001).
The Crisis - Seventh Fleet's calls for help
Shortly after 08:00 desperate messages calling for assistance began to come in from Seventh Fleet. One from Kinkaid, sent in plain language, read: "MY SITUATION IS CRITICAL. FAST BATTLESHIPS AND SUPPORT BY AIR STRIKES MAY BE ABLE TO KEEP ENEMY FROM DESTROYING CVES AND ENTERING LEYTE." Halsey recalled in his memoirs that he was shocked at this message, recounting that the radio signals from the Seventh Fleet had come in at random and out of order due to a backlog in the signals office. It seems that he did not receive this vital message from Kinkaid until around 10:00. Halsey later claimed that he knew Kinkaid was in trouble, but had not dreamed of the seriousness of this crisis.
One of the most alarming signals from Kinkaid reported that, after their action in Surigao Strait, Seventh Fleet's own battleships were critically low on ammunition. Even this failed to persuade Halsey to send any immediate assistance to Seventh Fleet (Woodward 1947, Fuller 1956, Morison 1963). In fact the Seventh Fleet battleships were not as short of ammunition as Kinkaid's signal implied (Morison 1956), but Halsey did not know this.
From 3,000 miles (5,000 km) away in Pearl Harbour, Admiral Nimitz had been monitoring the desperate calls from Taffy 3, and sent Halsey a terse message: "TURKEY TROTS TO WATER GG FROM CINCPAC ACTION COM THIRD FLEET INFO COMINCH CTF SEVENTY-SEVEN X WHERE IS RPT WHERE IS TASK FORCE THIRTY FOUR RR THE WORLD WONDERS" The first four words and the last three were "padding" used to confuse enemy listeners (the beginning and end of the true message was marked by double consonants). The communications staff on Halsey's flagship correctly deleted the first section of padding but mistakenly retained the last three words in the message finally handed to Halsey. The last three words, probably selected by a communications officer at Nimitz' headquarters, may have been meant as a loose quote from Tennyson's poem on "The Charge of the Light Brigade," suggested by the coincidence that this day, 25 October, was the ninetieth anniversary of the Battle of Balaklava - and was not intended as a commentary on the current crisis off Leyte. Halsey, however, when reading the message, thought that the last words - 'THE WORLD WONDERS' - were a biting piece of criticism from Nimitz, threw his cap to the deck and broke into "sobs of rage." Rear Admiral Carney, his Chief of Staff, confronted him, telling Halsey "Stop it! What the hell's the matter with you? Pull yourself together."
Eventually, at 11:15, more than two hours after the first distress messages from Seventh Fleet had been received by his flagship, Halsey ordered Task Force 34 to turn around and head southwards towards Samar. At this point Lee's battleships were almost within gun range of Ozawa's force. Two-and-a-half hours were then spent refuelling Task Force 34's accompanying destroyers (Morison 1956).
After this bizarre and perverse succession of delays it was too late for Task Force 34 to give any practical help to Seventh Fleet, other than to assist in picking up survivors from Taffy 3, and too late even to intercept Kurita's force before it made its escape through San Bernardino Strait.
Nevertheless, at 16:22, in a desperate and even more belated attempt to intervene in the events off Samar, Halsey formed a new Task Group (TG 34.5) under Rear Admiral Badger, built around Third Fleet's two fastest battleships (Iowa (BB-61)and New Jersey (BB-62) - ships capable of a speed of more than 32 knots) and Task Force 34's three cruisers and eight destroyers, and sped southwards - leaving Lee and the other four battleships to follow. As Morison observes, if Badger's group had succeeded in intercepting the Japanese Centre Force it would then have been seriously outgunned by Kurita's battleships (Morison 1956).
Cruisers and destroyers of Task Group 34.5 did, however, encounter and sink, off San Bernadino Strait, the destroyer Nowaki – the last straggler from Centre Force.
(Woodward 1947, Fuller 1956, Morison 1956, Cutler 2001).
Battle of Cape Engano - Final Actions
When Halsey turned Task Force 34 southwards at 11:15 he detached a task group (of four of its cruisers and nine of its destroyers) under Rear Admiral DuBose, and reassigned this to Task Force 38. At 14:15 Mitscher ordered DuBose to pursue the remnants of the Japanese Northern Force. His cruisers finished off the light carrier Chiyoda at around 17:00, and at 20:59 his ships sank the destroyer Hatsuzuki after a very stubborn fight. (Morison 1956).
When Admiral Ozawa learned of the deployment of DuBose's relatively weak task group he ordered the battleships Ise and Hyūga to turn southwards and attack it. However, the battleships failed to locate DuBose's group - which would (like those of Badger's Task Group 34.5 had it succeeded in intercepting Kurita's force) have been heavily outgunned. Halsey's withdrawal of all six of Lee's battleships in his forlorn and belated attempt to assist Seventh Fleet had now, absurdly, rendered Task Force 38 vulnerable to a surface counterattack by the Northern Force.
At about 23:10 the American submarine Jallao torpedoed and sank the light cruiser Tama of Ozawa's force. This was the last act of the Battle of Cape Engano, and - apart from some final air strikes on the retreating Japanese forces on 26 October - the conclusion of the Battle for Leyte Gulf.
(Woodward 1947, Fuller 1956, Morison 1956, Cutler 2001).
Criticism of Halsey
Halsey was criticized for his decision to take Task Force 34 north in pursuit of Ozawa, and for failing to detach it when Kinkaid first appealed for help. A piece of US Navy slang for Halsey's actions is 'Bull's Run,' a phrase combining Halsey's newspaper nickname "Bull" (in the US Navy he was known as 'Bill' Halsey) with an allusion to the Battle of Bull Run in the American Civil War.
In his dispatch after the battle, Halsey justified the decision as follows:
- "Searches by my carrier planes revealed the presence of the Northern carrier force on the afternoon of 24 October, which completed the picture of all enemy naval forces. As it seemed childish to me to guard statically San Bernardino Strait, I concentrated TF 38 during the night and steamed north to attack the Northern Force at dawn.
- I believed that the Centre Force had been so heavily damaged in the Sibuyan Sea that it could no longer be considered a serious menace to Seventh Fleet."
- (Morison 1956 - emphasis added by contributor).
Halsey also argued that he had feared that leaving Task Force 34 to defend the strait without carrier support would have left it vulnerable to attack from land-based aircraft, while leaving one of the fast carrier groups behind to cover the battleships would have significantly reduced the concentration of air power going north to strike Ozawa.
However, Morison states that Admiral Lee told him that he would have been fully prepared for the battleships to cover San Bernardino Strait without any carrier support. (Morison 1956).
Moreover, if Halsey had been in proper communication with Seventh Fleet it would have been entirely practicable for the escort carriers of Task Force 77 to provide adequate air cover for Task Force 34 - a much easier matter than it would be for those escort carriers to defend themselves against the onslaught of Kurita's heavy ships.
It may be argued that the fact that Halsey was aboard one of the battleships, and "would have had to remain behind" with Task Force 34 (while the bulk of his fleet charged northwards to attack the Japanese carriers) may have contributed to this decision. However, it would have been perfectly feasible (and logical) to have taken one or both of Third Fleet's two fastest battleships (Iowa and/or New Jersey) with the carriers in the pursuit of Ozawa, while leaving the rest of the Battle Line off San Bernardino Strait. (Indeed, Halsey's original plan for the composition of Task Force 34 was that it would contain only four, not all six, of the Third Fleet's battleships). Therefore, to guard San Bernardino Strait with a powerful battleship force would not have been incompatible with Halsey's personally going north aboard the New Jersey.
It does seem likely that Halsey was strongly influenced by his Chief of Staff, Rear Admiral Robert "Mick" Carney, who was also wholeheartedly in favour of taking all Third Fleet's available forces northwards to attack the Japanese carrier force.
Clifton Sprague, commander of Task Unit 77.4.3 in the battle off Samar, was later bitterly critical of Halsey's decision, and of his failure to clearly inform Kinkaid and Seventh Fleet that their northern flank was no longer protected:
In the absence of any information that this exit [of the San Bernardino Strait] was no longer blocked, it was logical to assume that our northern flank could not be exposed without ample warning.
Regarding Halsey's failure to turn Task Force 34 southwards when Seventh Fleet's first calls for assistance off Samar were received, Morison writes:
If TF 34 had been detached a few hours earlier, after Kinkaid's first urgent request for help, and had left the destroyers behind, since their fueling caused a delay of over two hours and a half, a powerful battle line of six modern battleships under the command of Admiral Lee, the most experienced battle squadron commander in the Navy, would have arrived off San Bernardino Strait in time to have clashed with Kurita's Centre Force ... Apart from the accidents common in naval warfare, there is every reason to suppose that Lee would have crossed Kurita's T and completed the destruction of Centre Force.
Instead, as Morison also observes:
- The mighty gunfire of the Third Fleet's Battle Line, greater than that of the whole Japanese Navy, was never brought into action except to finish off one or two crippled light ships. (Morison 1956, pp. 336-7 – Emphasis added by contributor)
- (Note - Task Group 34.5 in fact only finished off the straggling destroyer Nowaki, and this was not achieved by the battleships, but rather by their accompanying cruisers and destroyers) (Source: US Naval Historical Centre http://www.history.navy.mil/).
Perhaps the most telling comment is made laconically by Vice Admiral Lee in his action report as Commander of Task Force 34 -
No battle damage was incurred nor inflicted on the enemy by vessels while operating as Task Force Thirty-Four.
- Task Force 34 Action Report: 6 October 1944 - 3 November 1944
- (Main sources for this section: Woodward 1947, Fuller 1956, Morison 1956, Cutler 2001, Hornfischer 2004).
Aftermath
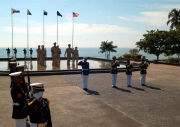
The battle of Leyte Gulf secured the beachheads of the U.S. Sixth Army on Leyte against attack from the sea. However, much hard fighting would be required before the island was completely in Allied hands at the end of December 1944: the Battle of Leyte on land was fought in parallel with an air and sea campaign in which the Japanese reinforced and resupplied their troops on Leyte while the Allies attempted to interdict them and establish air-sea superiority for a series of amphibious landings in Ormoc Bay — engagements collectively referred to as the Battle of Ormoc Bay. (Morison 1956).
The Imperial Japanese Navy had suffered its greatest loss since the Meiji Restoration. Its failure to dislodge the Allied invaders from Leyte meant the inevitable loss of the Philippines, which in turn meant that Japan would be all but cut off from her occupied territories in Southeast Asia. These territories provided resources which were vital to Japan, in particular the oil needed for her ships and aircraft, and this problem was compounded because the shipyards, and sources of manufactured goods such as ammunition, were in Japan itself. Finally, the loss of Leyte opened the way for the invasion of the Ryukyu Islands in 1945. (Fuller 1956, Morison 1956).
The major surface ships had returned to their bases to languish, entirely or almost entirely inactive, for the remainder of the war. The only major operation by its surface ships between the Battle for Leyte Gulf and the Japanese surrender was the disastrous and doomed sortie in April 1945 (part of Operation Ten-Go), in which the battleship Yamato and her escorts were destroyed by American carrier aircraft.
The first use of kamikaze aircraft took place following the Leyte landings. A kamikaze hit the Australian heavy cruiser HMAS Australia on 21 October. Organized suicide attacks by the "Special Attack Force" began on 25 October during the closing phase of the Battle off Samar, causing the destruction of the escort carrier USS St. Lo.
J.F.C. Fuller, in his 'The Decisive Battles of the Western World', writes of the outcome of Leyte Gulf:
The Japanese fleet had [effectively] ceased to exist, and, except by land-based aircraft, their opponents had won undisputed command of the sea.
When Admiral Ozawa was questioned . . after the war he replied 'After this battle the surface forces became strictly auxiliary, so that we relied on land forces, special [Kamikaze] attack, and air power . . there was no further use assigned to surface vessels, with the exception of some special ships'.
- And Admiral Yonai, the Navy Minister, said that he realised that 'the defeat at Leyte 'was tantamount to the loss of the Philippines' . .
- As for the larger significance of the battle, he said ' I felt that it was the end .' (Fuller 1956).
